
How to Install a Piezometer: A Step-by-Step Field Guide
In Western Australia’s complex resource and infrastructure industries, the piezometer has proven an essential tool for geotechnical and environmental monitoring.
Proper piezometer installation is crucial to obtaining reliable data, whether it’s for monitoring groundwater levels, pore water pressure or supporting regulatory compliance.
In this guide, we outline the general steps for installing common types of piezometer and some important considerations for ensuring long-term accuracy and performance.
What Is a Piezometer?
A piezometer is a sensor used to measure pore water pressure within soil, rock or fill material. They detect the pressure of groundwater in a specified zone, helping engineers assess ground stability, seepage risk and the effectiveness of drainage systems.
They are essential for borehole monitoring, tailings dam safety, and infrastructure development, where understanding subsurface behaviour is critical to structural integrity and regulatory compliance. Here’s how they should be installed:
Step 1: Planning the Installation
Before any fieldwork, you must undertake detailed planning. A well constructed plan includes:
- Site assessment: Understand the geotechnical conditions.
- Sensor selection: Choose the appropriate piezometer type (e.g. vibrating wire for long-term data, standpipe for manual monitoring or pressure transducer for real-time remote reporting).
- Depth determination: Define your monitoring depths based on the zone of interest.
- Compliance check: Ensure installation plans meet relevant WA regulations, such as Work Health and Safety (Mines) Regulations 2022, DWER licensing conditions and local government requirements.
Monitel supports clients in designing installation plans that produce high-quality data and are compliant with relevant guidelines
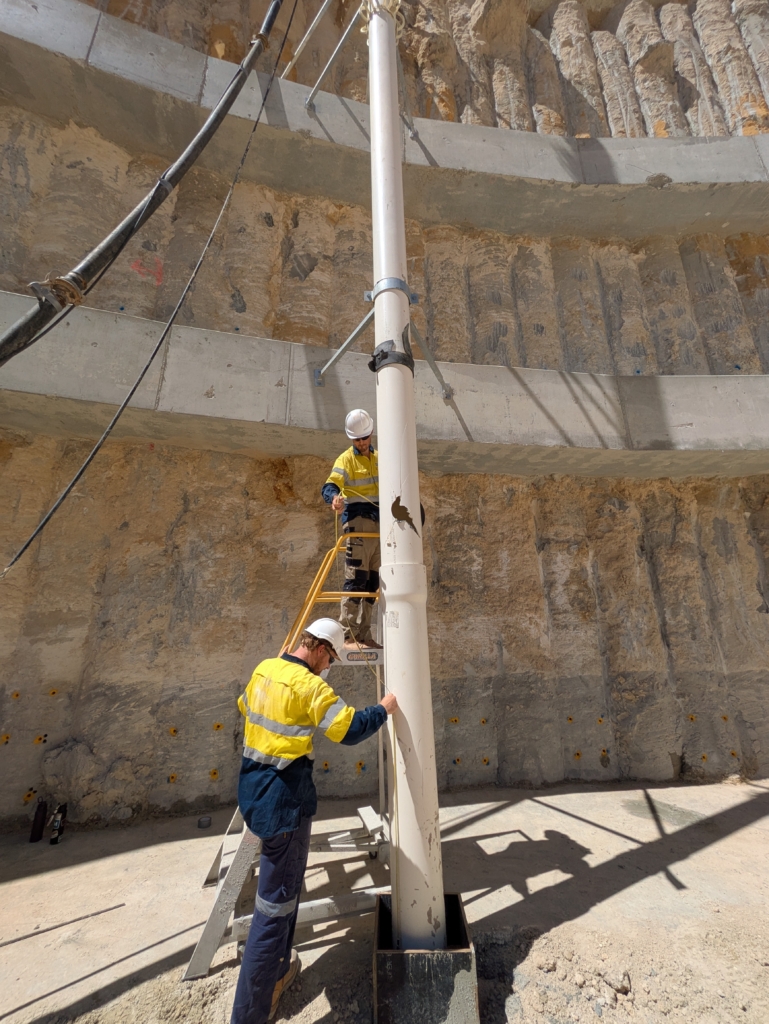
Step 2: Drilling or Driving the Borehole
Most piezometers are installed in boreholes, although some models can be deployed without drilling (such as drive-in).
For borehole installations:
- Drill to the target depth using appropriate methods
- Use temporary casing to prevent collapse during installation, especially in unconsolidated soils.
For drive-in piezometers:
- Use a drop weight or pushing system to insert the sensor directly into soft soils. This will minimise site disturbance.
Be sure to make observations and log soil and groundwater data during drilling. This can prove useful when adjusting the final sensor placement.
Step 3: Sensor Placement
For vibrating wire and strain gauge piezometer installation:
- Position the sensor tip at the specified depth.
- Surround it with clean, saturated silica sand to ensure hydraulic connectivity.
- Install a bentonite seal above the sand layer to isolate the sensor zone from upper groundwater.
- Backfill the remaining borehole.
For standpipe piezometers:
- Lower the open-ended PVC pipe (with porous tip) to the target depth.
- Install sand around the tip, followed by a bentonite plug to isolate the intake zone.
- Cap and protect the top of the pipe with a surface casing for easy manual readings.
For pressure transducer models:
- These can be installed inside standpipes or directly in open boreholes.
- Cable management and seal integrity are key to avoiding data noise and water ingress.
Step 4: Data Connection and Logging
Once the sensors are placed, connect cables to a logger or telemetry system. Monitel offer telemetry compatible systems for:
- Vibrating wire piezometers
- Pressure transducers (4–20 mA output)
- Strain gauge models
Data can be manually downloaded or sent to a cloud-based dashboard with real time visualisation and alerting. Logging fequency can vary from every few minutes to daily.
Step 5: Surface Completion and Protection
We like to consider these two facts when constructing a monitoring system:
- Piezometers are an investment
- Your site likely needs long-term results for compliance and planning.
For those reasons, it’s critical to protect the installation from environmental degradation. To do so, you can:
- Use a concrete pad or bollards to protect boreholes in trafficable areas.
- Label the piezometer location clearly with ID, depth and installation date.
- For standpipes, install a lockable cap to prevent tampering and contamination.
Step 6: Calibration and Initial Readings
Once installed:
- Take baseline readings to establish pre-monitoring pore pressure conditions.
- Verify logger configuration and connectivity.
- For vibrating wire sensors, ensure the frequency range is correct and stable.
- Log any field notes, weather or site activities that might influence early readings.
Tips for Long-Term Performance
If your vibrating wire or other piezometer installation will be monitoring long-term, you can keep your results reliable and accurate with:
- Moisture seals: Always check that seals are intact (especially for electrical sensors).
- Cable routing: Secure cables to reduce risk of movement, pinching or wildlife interference.
- Redundancy: Consider a second piezometer to provide backup data.
- Maintenance: Schedule routine data checks and site inspections. This is almost a necessity in rural WA, where extreme heat and harsh conditions are common.
Get in Touch for Assistance with Piezometer Installation
The Monitel team provide end-to-end piezometer installation services for geotechnical projects across Western Australia.
We’re trainined to understand the state’s unique climate and regulatory landscape and to ensure each system functions as designed. Whether you’re monitoring tailings dams, boreholes or embankments, we’ll keep your data accurate, secure and actionable.
For help with a piezometer installation, get in touch with Monitel.


Leave a Reply
Want to join the discussion?Feel free to contribute!